
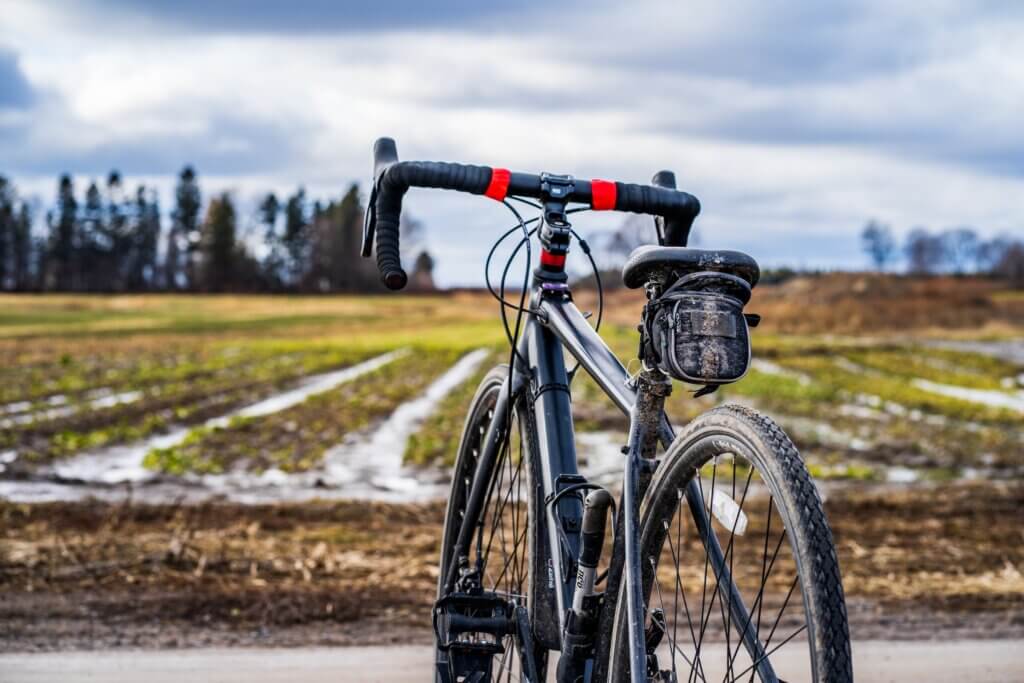
Winter cycling presents its own unique set of challenges, from the relentless rain and biting winds to treacherous icy roads. It’s a season that demands proper care and preparation for both you and your trusty bike.
Whether you’ve dedicated a winter road bike to the elements or are winterproofing your cherished carbon steed, the goal is the same—avoiding those cold, wet, and miserable roadside stops.
In this guide, we’ll explore the essential steps to ensure your bike is ready for winter cycling, so you can embrace the season with confidence.
Step 1: Prepare Your Bike – A Pre-Winter Service
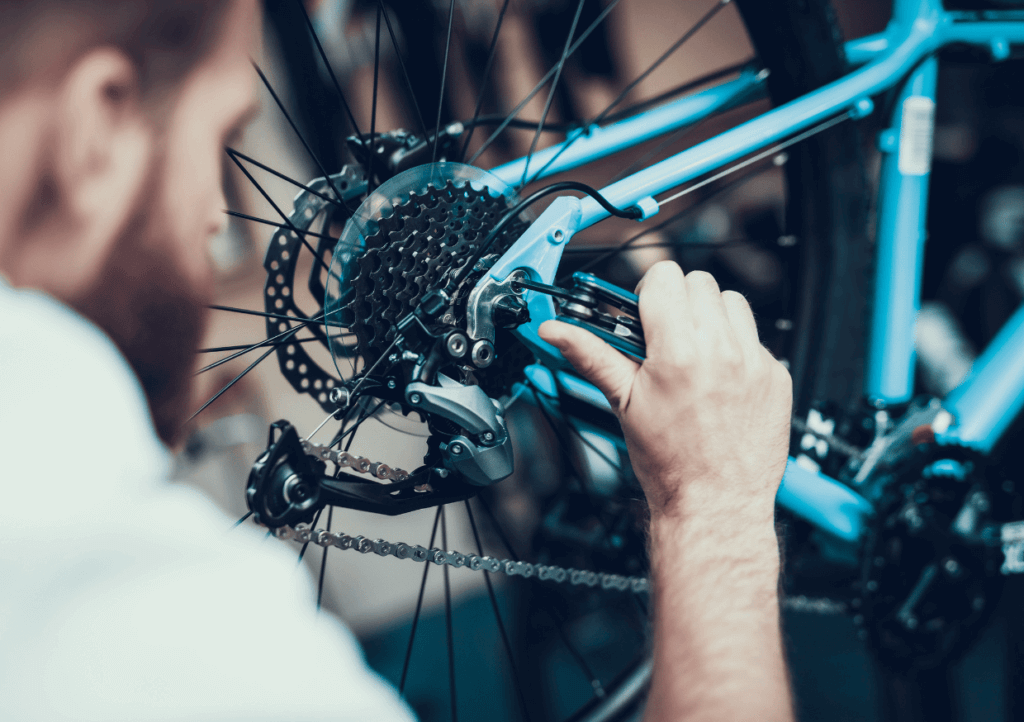
Before you begin the cleaning and inspection process on your own, consider booking your bike into your local bike shop for a pre-winter service. This is a smart move to ensure your bike receives professional attention.
Their expertise will cover everything from cleaning, lubrication, and a thorough inspection, guaranteeing that your bike is in the best possible condition to face the winter elements.
Local bike shops have experienced technicians who know the specific needs of your bike, especially when transitioning from the mild seasons to winter. They can identify potential issues you might overlook, such as worn brake pads, loose bolts, or frayed cables. Addressing these issues early can prevent costly breakdowns in the middle of a winter ride.
Additionally, a professional service will ensure that your bike’s components are properly lubricated, which is essential for a smooth and efficient ride in winter. They will use winter-specific lubricants that are more resistant to cold and moisture, ensuring that your bike operates flawlessly even in challenging conditions.
By entrusting your bike to the professionals, you’ll enjoy the peace of mind that it’s ready for safe and enjoyable winter cycling.
Step 2: Swap Out Your Tires for Winter-Ready Ones
When it comes to winter cycling, the tires on your road bike can be the difference between a safe, enjoyable ride and a challenging, nerve-wracking experience. Swapping out your regular tires for winter-specific ones is a smart move that can significantly enhance your safety and performance.
Let’s explore the key factors to consider when choosing the perfect winter tires for your unique cycling needs.
1. Tire Width and Tread Pattern: The width and tread pattern of your winter tires play a crucial role in your cycling experience. Wider tires, typically starting at 25mm, offer more stability and traction on wet, slippery, and even icy roads. A pronounced tread pattern with sipes or small cuts acts as water channels to prevent hydroplaning and increase grip. Tires with a combination of smooth and textured areas strike a balance between low rolling resistance on dry roads and improved traction on wet or snowy surfaces.
2. Puncture Resistance: Winter roads are often littered with debris and grit. To minimize the risk of punctures, opt for tires with reinforced casings and puncture-resistant belts. These features can withstand the challenges of less-than-ideal road conditions.
3. Rubber Compound: The rubber compound used in winter tires affects their performance. Softer rubber compounds remain pliable in cold temperatures, ensuring better grip and traction on icy patches. This is essential for maintaining control in unpredictable winter conditions.
4. Tubeless or Clincher: Decide whether you prefer tubeless or clincher tires. Tubeless tires allow you to run lower pressures for improved grip and comfort. They’re also less susceptible to pinch flats. Clincher tires are the traditional choice, offering straightforward maintenance and repair.
5. Studded Tires: In regions with extreme winter conditions featuring heavy snow and ice, studded tires are an option. These tires have metal studs in the tread for exceptional traction on icy surfaces. Keep in mind that studded tires can be noisy and have more rolling resistance on clear roads, so they are best suited for the iciest conditions.
Select your winter tires based on the specific conditions you’ll encounter during your rides. Whether it’s wet and cold or icy and snowy, there’s a tire designed to enhance your safety and performance. Investing in the right set of winter tires ensures you’re well-prepared to face the challenges of winter cycling with confidence.
Step 3: Install Mudguards for Winter Protection
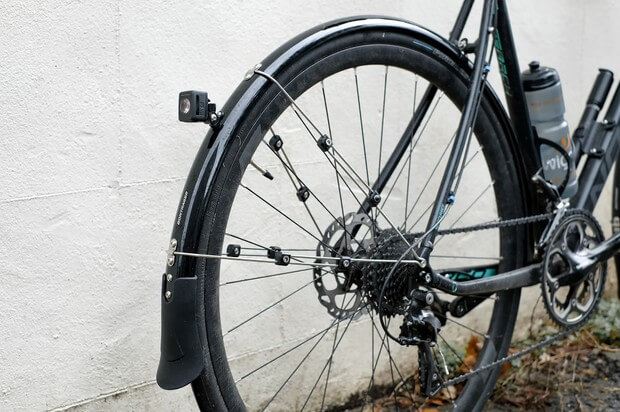
When preparing your road bike for winter cycling, don’t underestimate the importance of full-length mudguards. These practical accessories serve as your first line of defense against the elements, ensuring a more enjoyable and cleaner ride during wet and muddy winter conditions.
In many countries with wet winters, cycling clubs often require riders to have full mudguards installed on their bikes, particularly after October. The reason is clear – full mudguards not only protect your fellow riders from road spray but also shield critical components of your bike from the damaging effects of grit and dirt.
By preventing this dirt from reaching your drivetrain, brakes, and frame, mudguards extend the lifespan of your equipment and reduce maintenance needs.
Moreover, when it comes to mudguards, a full-length set is your best bet. Full mudguards provide the most comprehensive coverage, ensuring that you and your bike stay as clean and dry as possible. They effectively block water, slush, and debris from being thrown up onto your frame and components.
Short mudguards on the rear wheel might keep the spray away from you, but anyone following close behind will end up getting drenched. Being considerate of those who ride with you is a sign of a responsible cyclist.
In the past, fitting mudguards to road bikes could be a hassle due to narrow clearances and the absence of mounting points. However, bike manufacturers have recognized the value of mudguards for all-season cycling. Nowadays, even high-end performance bikes are equipped with mudguard mounts, making installation much more straightforward.
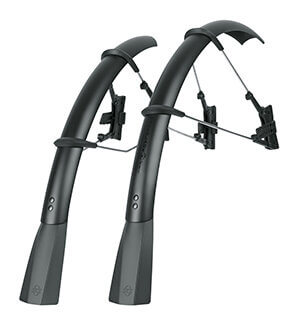
CHECK PRICE of SKS RaceBlade Pro XL Black Fenders
Step 4: Install Bike Lights

There are various types of bike lights suitable for winter conditions. For the front, consider a powerful LED headlight that provides a broad, bright beam. This will not only illuminate your path but also make you highly visible to other road users, enhancing safety during low-light conditions.
When choosing a headlight, look for models with multiple brightness settings and a long battery life. This flexibility allows you to adjust the beam intensity according to your needs, whether you’re riding on well-lit streets or dark rural roads. USB-rechargeable lights are also a convenient and cost-effective choice.
For the rear, a red taillight is essential. A good taillight should have various modes, including a steady beam and flashing options. This variety helps grab the attention of drivers and other cyclists behind you. Red lights are universally recognized as indicators of the rear of a vehicle, making your presence on the road unmistakable.
When installing your lights, ensure they are securely attached to your bike and properly angled for optimal visibility. Consider using additional reflective accessories, such as reflective tape on your frame, to further increase your visibility from all angles. Having bright and reliable lights enhances your safety and keeps you confident during winter rides.
There’s near endless choice when it comes to lights, but we’re big fans of the Lezyne Hecto Drive 500XL and Rear Strip Drive Light Set.
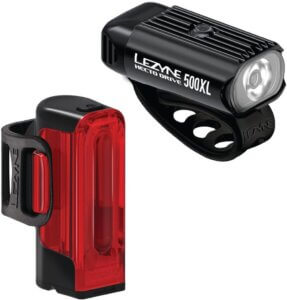
CHECK PRICE of Lezyne Hecto Drive 500XL
Step 5: Adjust Your Brakes and Gears
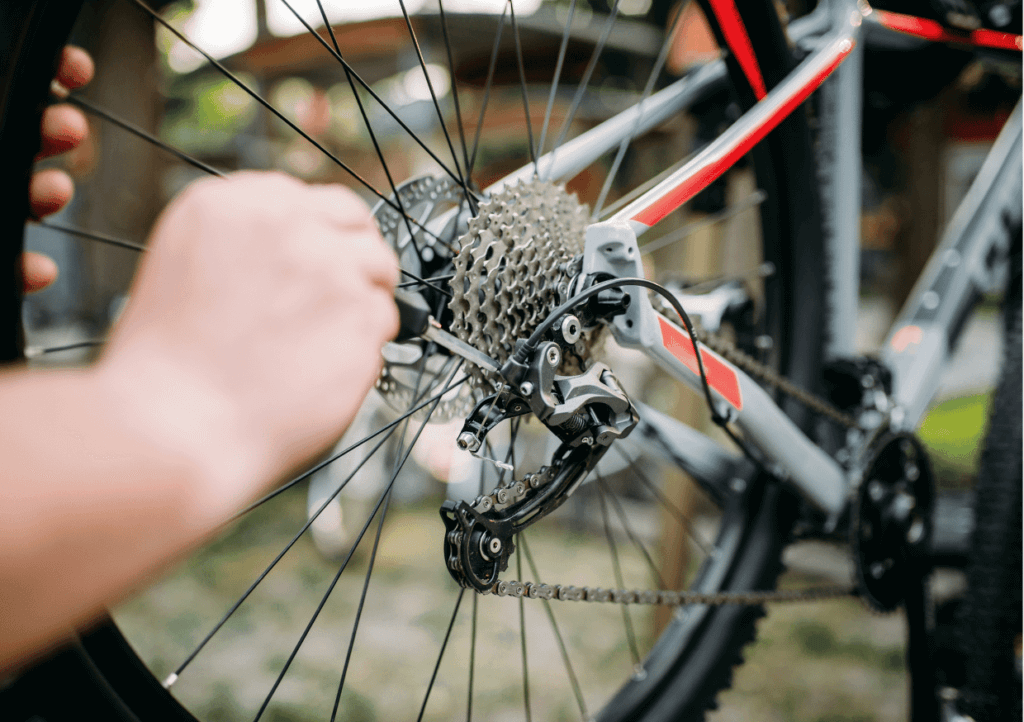
To fine-tune your brakes for winter conditions, start by checking the brake pads. Make sure they’re not worn down and replace them if necessary. Brake pads can wear out faster in wet and muddy conditions, so keeping them in good shape is crucial for safe stopping.
Adjust the brake cable tension to ensure that your brakes respond quickly and consistently. This is especially important when riding in unpredictable winter conditions, where you may need to stop suddenly. Properly adjusted brakes will give you the confidence to navigate through wet, icy, or snowy roads.
Gearing adjustments are equally important. A clean and well-lubricated drivetrain ensures smooth gear changes even in challenging weather. Shift through your gears to make sure they engage correctly, and adjust the cable tension if needed.
Your goal is to maintain seamless gear changes, enabling you to find the right cadence and power regardless of the winter road conditions.
By taking the time to fine-tune your brakes and gears, you’ll be well-prepared to handle the uncertainties of winter cycling. Your bike’s responsiveness and reliability will help you stay in control and ride safely even when the roads are less than ideal.
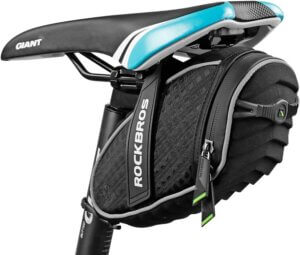
Step 6: Carry a Saddle Bag with a Repair Kit

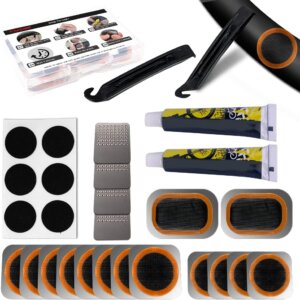
Your saddle bag should be stocked with essential repair items for on-the-go maintenance during your winter rides. The following items are crucial for ensuring that you’re prepared to handle common issues like flat tires and minor mechanical problems without having to cut your ride short:
1. Spare Tubes: Carrying a couple of spare inner tubes that matches the size of your bike’s tires is essential. If you get a flat, replacing the tube is often quicker and easier than patching it on the road.
2. Tire Levers: These handy tools make it much easier to remove and reinstall the tire when fixing a flat. Having a pair of tire levers can save you a lot of time and effort.
3. Multi-Tool: A multi-tool with various Allen keys and screwdriver heads is invaluable. It allows you to make minor adjustments and repairs to your bike’s components, such as the saddle, handlebars, and derailleurs.
4. Mini-Pump: A compact and portable mini-pump is essential for inflating your tire after repairing a flat. Make sure it’s suitable for the valve type on your inner tube.
5. Patch Kit: While carrying a spare tube is convenient, a patch kit can be a lifesaver if you experience multiple flats on the same ride. It allows you to repair a tube and get back on the road.
6. Zip Ties: These versatile little tools have a wide range of applications for quick fixes and securing loose components in a pinch.
7. Emergency Tire Boot: A tire boot is a reinforced patch that can temporarily fix a cut or gash in your tire until you can replace it. It’s especially useful if you encounter debris on the road.
Having these essentials in your saddle bag ensures you’re well-prepared to handle common bike issues that may arise during your winter rides. It’s a proactive approach to self-sufficiency and ensures that you won’t be left stranded in the cold.
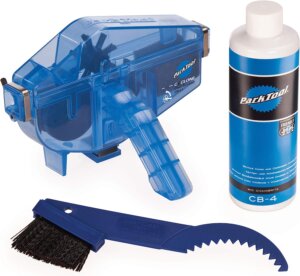
Step 7: Lubricate Moving Parts
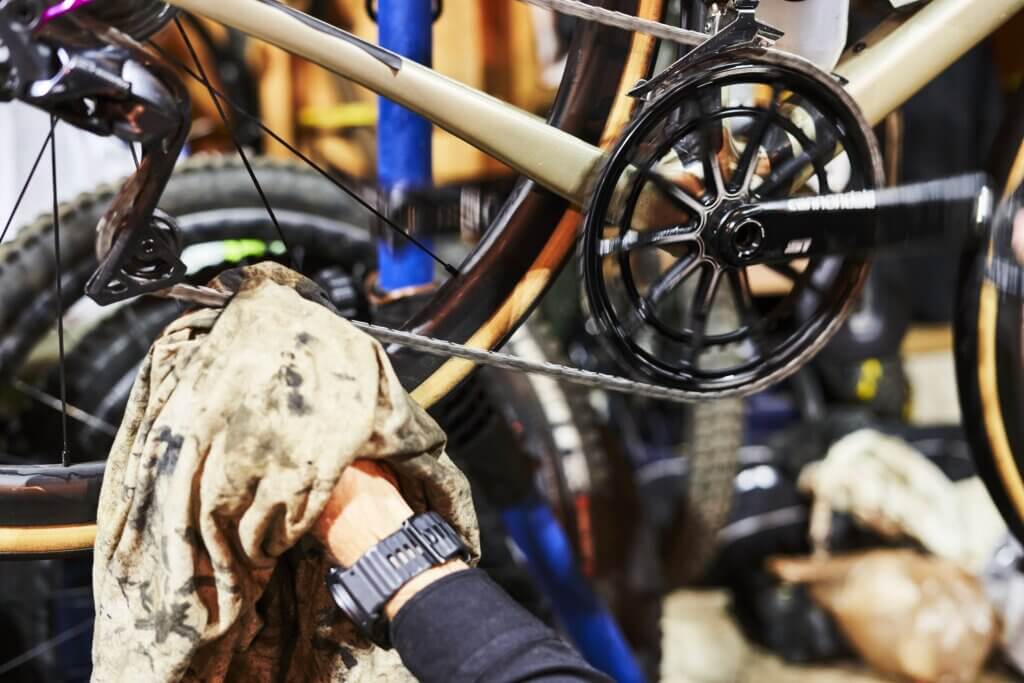
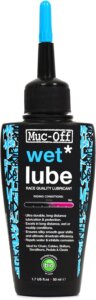
When it comes to keeping your bike’s moving parts in top shape for winter cycling, choosing the appropriate lubricant is essential. In winter, conditions can be wet and challenging, so it’s wise to opt for a winter-specific bike lubricant.
This specialized lubricant is designed to withstand the moisture and cold temperatures, ensuring that your bike’s performance remains consistent even in adverse weather.
Winter-specific lubricants, sometimes referred to as wet lube, aren’t actually wet but are formulated for wet conditions. These lubricants are slightly stickier and thicker compared to their summer counterparts.
While this might make them prone to attracting more dirt, they offer a significant advantage – they don’t wash away in the rain or puddles. This means that your bike’s chain, derailleur pivots, and other moving parts stay protected, reducing wear and tear during winter rides.
To effectively apply the winter-grade lubricant, begin by thoroughly cleaning the parts to remove any accumulated dirt or remnants of old lubricant. Once cleaned, apply a thin layer of the winter-grade lubricant, ensuring complete coverage. This will not only reduce friction but also keep your bike running smoothly despite the cold and wet conditions.
It’s important to note that regular maintenance during the winter season is crucial. Keep an eye on the lubricant’s performance and reapply it when you notice it wearing off or after particularly wet rides.
Consistent and proper lubrication will significantly contribute to your bike’s longevity and reliability throughout the winter, ensuring a smoother and more enjoyable ride.